Saturday, January 11, 2014

Time for more upgrades to the AMPhibian.  The epoxy skin job has held up well, no more cracks in the two years since I did it, so it's obviously time to stress it even more.  One large drawback of the plastic bathtub design of AATV's is the lack of mounting points for any sort of equipment.  The solution is to make an angle iron "belly band" that goes around the perimeter seam.


The purpose of this was to allow me to attach a plow.  I wanted to cut a trail into a steep side hill leading down to my stream.  I wasn't sure if the AMPhibian would have the traction and power needed so before I got too far into the project I slapped together a crude mount that would allow me to test the capability for bulldozer duty.


It worked well enough that I used it as is for quite a while and moved some significant dirt, before the wood finally split.


I brought it into the shop and began the transformation from wood into steel, including the belly band.  The design was adapted from a similar setup I'd seen on 6x6 world.


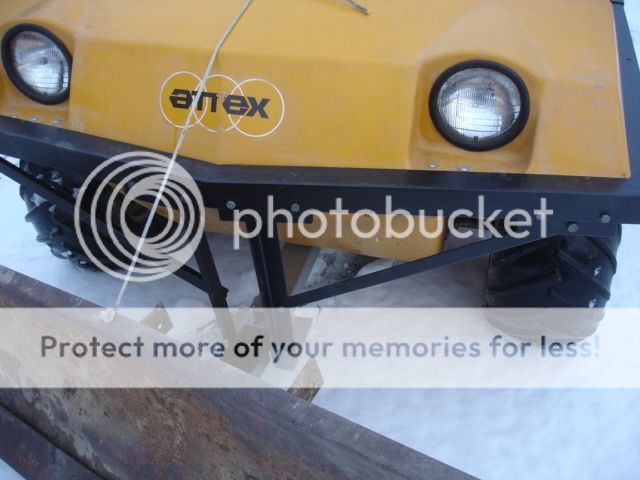
The angle iron pieces act as clamps to hold the belly band in place without drilling into the plastic and weakening it.
Before the ground was frozen I was able to get the trail in passable condition, though it needs more grading to reduce the slope so it's not such a scramble to get back up, especially when wet and muddy.


Now the plan is to get two 24 Volt linear actuators to move the blade up and down, each running off one half of the 48 Volt pack.  Using two will also allow me to add tilt capability if I wish.  I don't think I'll bother with power angle, but who knows.  With the belly band in place maybe I'll finally get around to building that rollbar.

Wednesday, January 11, 2012

AMPhibian gets a new skin and goes for a swim

The 40 year old ABS plastic was hittin the "crack" pipe way too hard and needed an intervention so I put the old AMPhibian in for some major rehab. Stripped it, flipped it, and hit it with 24 grit to rough up the surface for epoxy resin and fiberglass cloth. Glued up the cracks with some SEM epoxy bumper repair goo and some two part methacrylate glue, both seemed to work fairly well as long as I "V'd" out the cracks really well, then applied the cloth and epoxy laminating resin. Feels pretty tough so far but I haven't beaten on it with a hammer or anything, I'll wait and see what happens naturally during use. I had planned to put a HDPE skid plate over that but it didn't exactly come out the way I had hoped. I had a space heater, heat lamp, heat gun, and a small propane torch with a flame spreader but could not apply enough heat over a large enough area to get smooth compound bends. I ended up with warping and lumps and probably a ruined 4x6 piece of HDPE. So for now I'll just see how the fiberglass holds up alone.


I also retarded the motor timing back to neutral for greater torque. Since I'm not running higher voltage the advancement wasn't necessary, though I did lower my top speed by about 4 mph. Not much of a concern for my purposes.

Since the cracks were finally fixed I took it for a dip. A little heavy in the back end but it does float.


Friday, December 26, 2008

Polychain Drive Belt

The latest modification to the AMPhibian: Gates polychain drive belt and sprockets.


I'm not sure if the sound in the video really shows the difference but now the motor brush noise is the dominant sound as opposed to the rattling of the chain and sprockets. The roller chain was already showing some stretch and it's been suggested that #50 chain under changing torque loads and speeds up to 6000 RPM is way beyond it's long term capacity so this should be a worthwhile modification even beyond the noise factor. Also I no longer have chain lube being sprayed around my motor and batteries.
Another possible benefit is I can get two more hubs for the taperlock sprockets which would allow me to swap them fairly easily and double my top speed to almost 40. I don't know if I'll bother since I have no need for that but it might be fun to try and the hubs are fairly cheap.

Tuesday, December 16, 2008

New Mod, portable 120 volt power supply


Trying to get the most out of the AMPhibian I wanted a way to utilize the power of my 48 volt DC battery pack in a 120 volt AC mode to run tools and provide some backup power for my house in case of an outage. You can buy 12 volt DC to 120 volt AC inverters but a 48 volt version isn't easy to find, or cheap. However I spoke to someone on the EVDL who gave me the idea to find an old computer back up power supply, or UPS, without batteries and use my pack. Since most larger UPS run off 48 volts this would be perfect for me. I picked up a used APC 2200 UPS without batteries for $160 shipped and hooked the battery inputs up to my 48 volt battery pack in the AMPhibian. I now have a portable 120 volt AC power supply with 1600 watt capacity. I was able to run my Makita electric chainsaw off it as a test tonight. Not sure for how long, but I should be able to drive into the woods, cut a tree into log lengths, and drag them home, all on electricity.

Monday, November 3, 2008

A wee bit of a problem here....

So what happens when you are coasting backwards a little too fast and hit the brakes, just as you go over a steep bank? This:


With the AMPhibian on top of me I began to question the benefit of adding 240lbs of batteries to a 500lb vehicle. Luckily since most of the weight was in the back I was able to lift the vehicle enough to crawl out from under it and walk back up to the house. After washing the blood off my face I remembered that the contactor switch was still on and the controller was still powered up. Walked back down and turned it off, made a weak attempt to push the vehicle back over, gave up, and walked back to the house and called for a ride to the emergency room. 9 stitches later I'm bruised but not beaten, and the AMPhibian is remarkably unscathed, I guess I cushioned the impact. With help from my father I used a come a long to winch it part way up, took out the batteries, flipped it back over, put them back in, and it seems to be working fine. I will be adding a rollcage, and better hold downs for the batteries since they did end up moving around quite a bit. Very glad I went with Odyssey sealed lead acid as opposed to flooded, and very glad this was an EV and not an ICE, since the gas tank would have been right over my head probably leaking all over me.

Earning its keep, logging with the AMPhibian

Here's a little video of the AMPhibian dragging about a 600lb red oak log through the woods with little effort. This thing works so well, as long as I keep the wheels underneath me, (more on that in the next post).

Monday, June 30, 2008

Videos

Motor test:


Trail ride:


High Speed action:


Hill Climb:

Sunday, June 29, 2008

IT'S ALIVE!!!!

Yes finally I was able to drive this thing and it actually seems to work exactly as planned, imagine that! Great low end torque, decent top speed around 20mph, (frankly faster than I need in the woods), no smoke, and only the whir of the electric motor and chains. Still some work to do before it's water ready, but this thing is really cool! So much nicer than the old 2 stroke that was in it. Pictures and video to follow soon.

Sunday, May 4, 2008

Motor mounted, batteries in place for spacing the battery brackets. I'll try them all in the back at first. Hopefully it won't be too much weight back there.

Friday, May 2, 2008

The Batteries arrive

The new Odyssey batteries arrived today. Now the only pieces I'm missing are the throttle and battery cables.
These batteries have the potential to last 10 years, can't freeze, and should be able to deliver high current levels and take fast charging. I'll be playing with battery placement tonight, though I don't have many options since I want to keep the weight as low as possible. They'll all fit in the back behind the motor and transmission but I'd like to get some of the weight up front if I can for better distribution.

Friday, April 25, 2008

A few pics of the finished motor mounts. I slotted the lower mounts to allow the motor to be moved back and forth to tension the drive chain.
There is another part not in the picture that bolts to the front of the lower mounts and has two bolts that push the upper mounts back to tension the chain. More to come....

Saturday, April 12, 2008

Update on the AMPhibian

Things have been progressing on the conversion. I've ended up spending more time fixing things on the Attex than working on the conversion. Bad axle bearings, bent axles, worn drive chains, and body cracks. The body cracks have been a real pain, ABS plastic isn't easy to repair in high stress areas. Unfortunately the body tub is pretty thin in the lower corners, where it should be the strongest. I've been using a combination of heat welding and ABS chips dissolved in acetone, with varying degrees of success. I will be making a skid plate out of heat formed HDPE plastic as a final reinforcement.
On the conversion side the motor mounts are just about done and I need to mount the contactor and controller.
I should have some pictures up soon.

John

Friday, February 15, 2008

The project vehicle

I want an EV. I like the idea of an electric powered vehicle, for many reasons, but for this project the main reasons are I'd like to drive around the woods and haul firewood without a lot of noise and without driving in a cloud of smoke. My situation also called for water crossing capabilities, good traction for climbing hills, and low end power for hauling wood. After considering 4 wheelers and not feeling they were up to my needs I remembered 6x6's such as Max, Argo, and Attex, also known as AATV's and 6 Wheelers. After searching around I found this baby.
Behold, the Attex!


It's a 6 wheel drive, amphibious vehicle, probably mid 1970's vintage, skid steer, 2 stroke powered, and lots of fun! However, because of the 2 stroke it's loud, smelly, polluting, and has a narrow powerband that doesn't come into play until you rev the motor up and get the ramp clutches going. That's fine for steady high speed but not great for low end torque and slow speed maneuvering, which is what I need.

Here is the solution.
A 7.5 inch Yale forklift motor modified by Jim Husted of HiTorqueElectric.com


An electric motor fits the bill perfectly. No noise and smoke, full torque from 1 rpm, no gas to buy, no spark plugs or oil to change, and I can charge it up for pennies, even fewer pennies if I put a timer on it and charge it at the night rate, which I will do. Interestingly Attex actually made an electric version of the 6x6 back in the early 70's, so I'm not really doing anything new. They ran theirs with 6 12 volt batteries at 36 volts, I'll be running mine with 4 12 volts at 48 volts. I'll have a lighter vehicle with more power but a shorter run time, which will be fine for my situation. Someday if Lithium batteries get cheaper I can increase both power and range while reducing the weight as well.
At this stage I've pulled the old motor and gas tank and have started designing the new motor mounts and battery brackets.
Costs so far:
Attex $1100.00
7.5 inch Yale motor from HiTorqueElectric $550.00 (inc. shipping)
Alltrax AXE 4845 Controller (Used) From evdrives.com $320.00 (inc. shipping)

Still to come:
4 AGM batteries, probably around $720.00
Charger $280.00
Contactor $65.00
Chain and sprockets around $70.00
Throttle, cable, diode, resistor, etc. $35.00
Battery cables and terminals? $50.00
Projected total so far $3190.00 (Updated cost)
Sold old motor for $150.00 -
Total $3040.00

I'm sure it will increase but it should stay under $3500.00 when finished, which is about what I was looking at for a good used 4x4, which couldn't float.
Still a lot to do but I can't wait to drive this thing as an EV!

John